Are you struggling to get your head around a particular facet of Razer Synapse? Fret not, as we’ve got you covered in our comprehensive guide covering all the most common questions and troubleshooting concerns.
What is Razer Synapse?
Razer Synapse is a configuration utility designed to work exclusively with the Razer line of peripherals, specifically mice, keyboards, mouse pads, headsets, and speakers. It allows for users to determine precise functions for keys/buttons to facilitate in-game or general computing actions.
For example, using Razer Synapse, you could just as well assign a key to start playing media or assign a mouse button to trigger the crouch mechanic in PUBG.
Features of Razer Synapse & Benefits of Using The Software
– Create key binds, assign complex macros, and devise your own customised RGB lighting profiles.
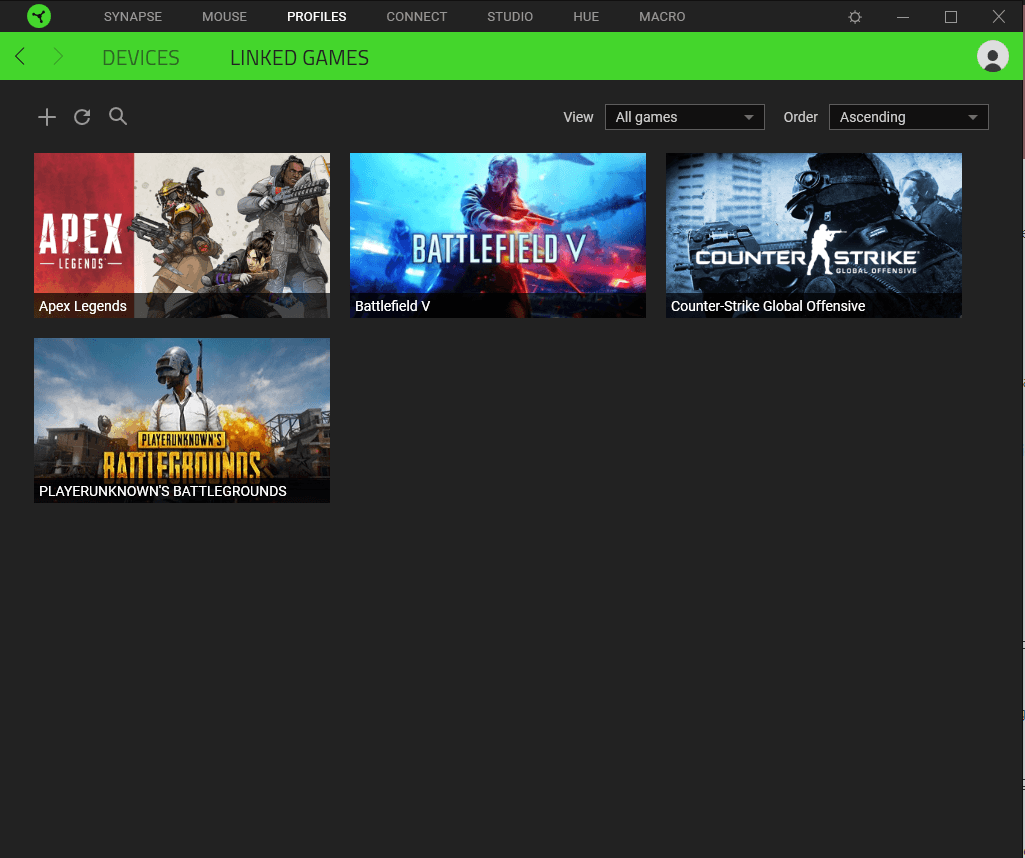
– Synapse allows you to save profiles to either a device’s onboard memory or to the cloud for easy access. These can be linked to specific games and will launch when you start playing automatically.
– The latest iteration of Synapse, version 3, is a much-improved revision of Synapse 2 with a brand new UI, more straightforward incorporated navigation (warranty registration, profiles library, device management), and a plethora of customisation options.
– Synapse incorporates Hyper-Shift functionality that allows you to temporarily change the functions of your mouse buttons or keyboard keys alongside your default settings with the press of a button.
– Synapse also features Chroma Studio, a powerful lighting configuration tool with a range of effects and fine-tuning options to create unique and game responsive RGB profiles.
Common Questions
How To Install Razer Synapse?
Head over to the Razer Synapse website and click on ‘’Download Now’’ to download the install file. Once downloaded, double click on the executable and follow the installation wizard. We recommend a restart before opening the program for the first time.
The latest iteration, Razer Synapse 3, currently only works on PC and not Mac. If you want to use the utility on a Mac system, you can download Razer Synapse 2 right here.
How To Update Razer Synapse?
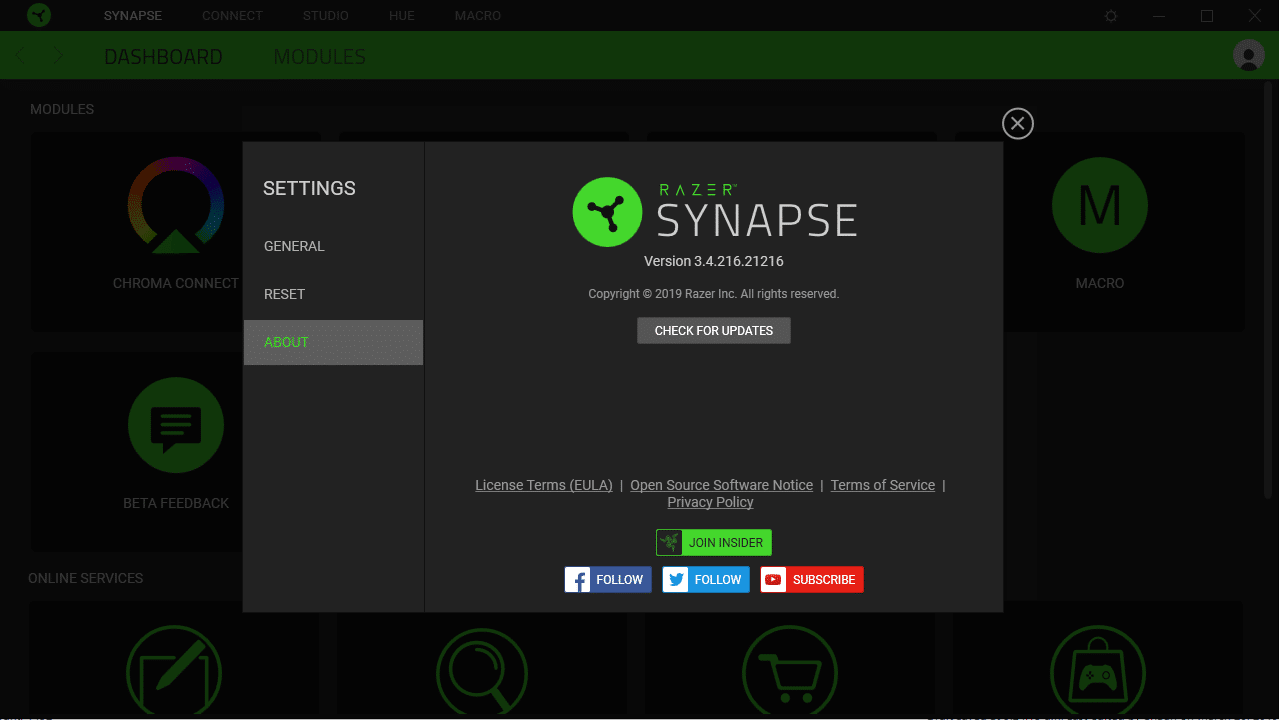
Open up Razer Synapse and click on the ‘’Settings’’ cog-wheel icon in the top right corner. Click on ‘’About’’, then click on ‘’Check for Updates’’. Razer Synapse will then check you are running the latest version and if not download/install it for you automatically.
Throughout normal usage, the utility will also prompt you to update to the latest version when available via a popup.
With What Devices Is Razer Synapse Compatible?
Razer Blade, Razer Turret, Razer BlackWidow Elite, Razer Huntsman Elite, Razer Huntsman, Razer BlackWidow Lite, Razer BlackWidow Chroma V2, Razer BlackWidow X Chroma Black, Razer BlackWidow Tournament Edition Chroma V2, Razer Ornata Chroma, Razer Cynosa Chroma Pro, Razer Cynosa Chroma, Razer Tartarus V2, Razer Mamba HyperFlux, Razer Lancehead, Razer Mamba Wireless, Razer Mamba Elite, Razer Abyssus Essential, Razer DeathAdder Elite, Razer Mamba Tournament Edition, Razer Lancehead Tournament Edition Black, Razer Basilisk, Razer Naga Trinity, Razer Atheris, Razer Goliathus Extended Chroma, Razer Goliathus Chroma, Razer Firefly Hard Edition, Razer Firefly Cloth Edition, Razer Nari Ultimate, Razer Nari, Razer Nari Essential, Razer Kraken Tournament Edition, Razer Nommo Chroma, Razer Nommo Pro, Razer Chroma Hardware Development Kit, Razer Base Station Chroma, and Razer Kiyo.
Razer plans to expand support to a large number of legacy devices soon.
How To Add A Device To Razer Synapse?
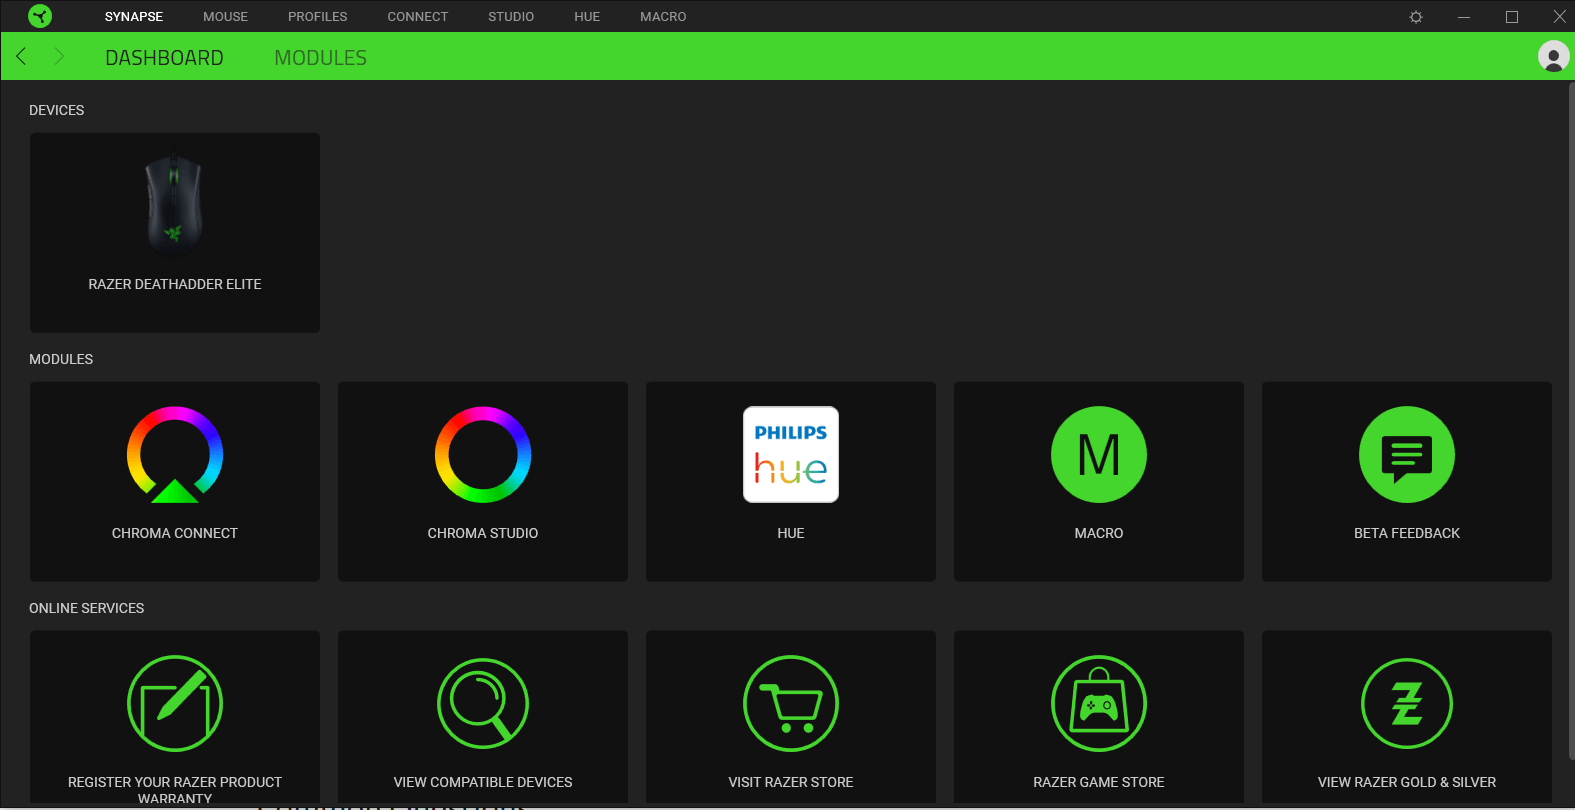
Plug in you Razer Synapse compatible device and load up the program. Synapse will automatically recognise it and add it to the landing page under ”Devices”.
How To Create Custom Profiles?
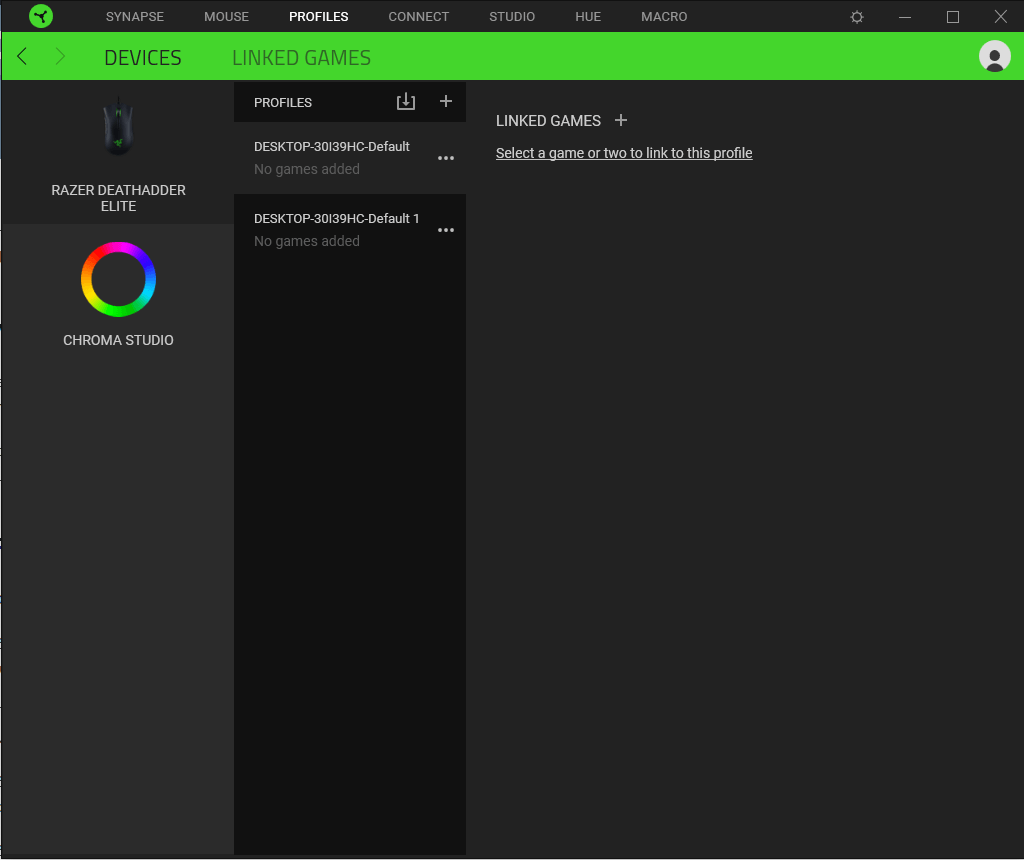
- Click on ”Profiles” in the top menu.
- On the left-hand side, choose which device you want to create a profile for, then click on the + sign next to ”Profiles” to the right.
- From here you can select a name for the profile and assign it to a specific game or applications.
- Click on your device in the menu along the top and then select the newly created profile from the ‘’Profile’’ drop-down menu near the top of the screen.
- Note the customisation options in the left-hand menu that appears. These range from keyboard and mouse functions to macros, and lightning, by way of multimedia/shortcuts/text functions.

How To Import Custom Profiles?
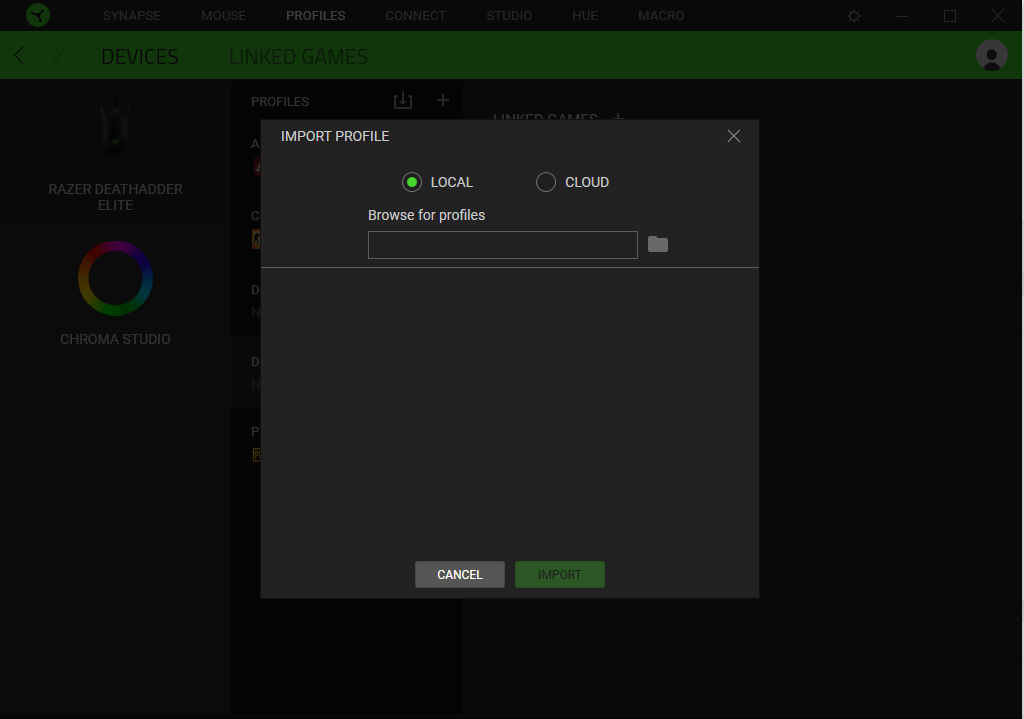
- Click on your device in the top menu from the launch screen.
- Next to the ”Profile” drop-down menu, click on the download icon to the left of the add icon and select ”Import”.
- Select the profile to import from your PC or cloud and hit ”Ok”.
How To Set A Default Profile?
- Click on ”Profiles” in the top menu.
- Next, select the profile you want to set as default and click on the three-dot icon and select ”Default”.
How To Create Macros?
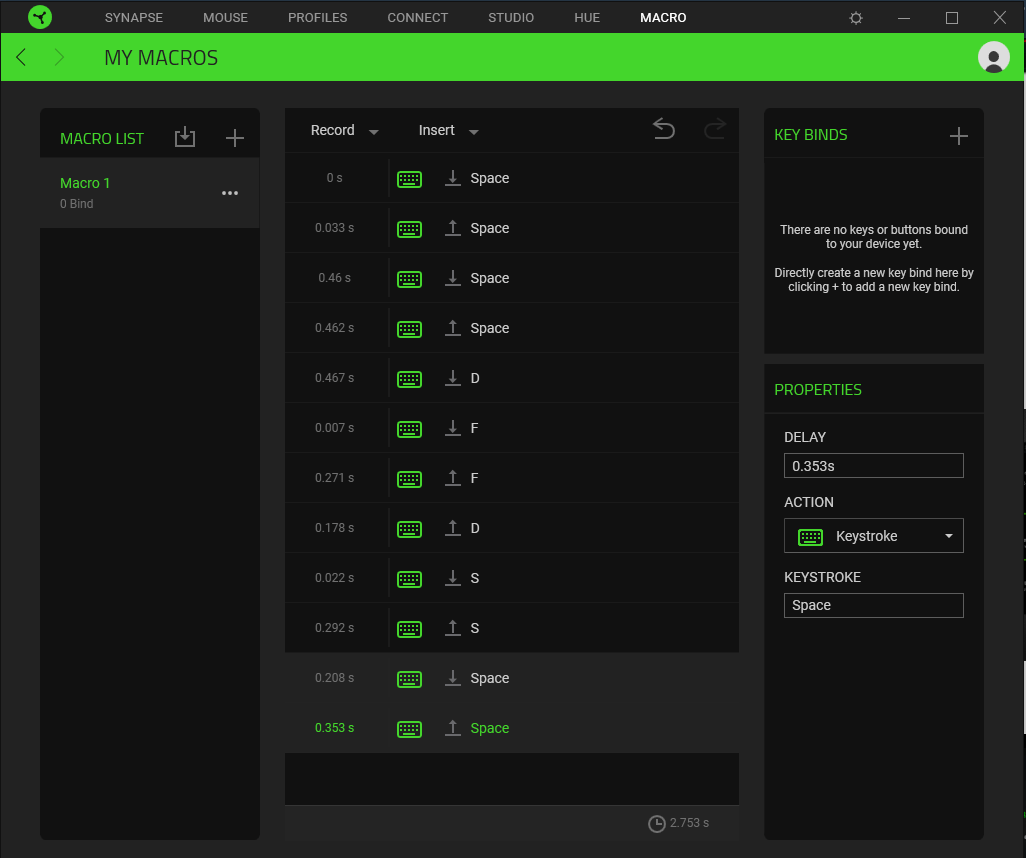
- Click on the ”Macros” tab along the top of the Synapse window.
- Click on the + icon next to ”Macro List”, and the program will create a Macro in the list just below titled ”Macro 1”.
- From here, click on ”Record’’ in the window to the right. You can then determine delay settings and mouse movement tracking options.
- Click on ”Start” and after the countdown enter the sequence of keys or mouse movements you want to use in the macro. You can delete specific actions by hovering of them and clicking the trash can icon that appears. Alternatively, edit them via the edit window to the right. You can also insert actions manually by clicking on the ”Insert” drop-down menu and choosing from keystrokes, mouse buttons/movements, text, commands, etc.
- Next, click on your device (mouse, keyboard, etc.) in the top menu, then select the button/key you want to assign the macro to.
- In the left-hand menu, select ”Macro”, then the macro you want to assign from the drop-down menu titled ”Assign Macro”. You can also determine the playback options just below from play once, play multiple times, toggle continuous playback on/off using assigned key, and play while the assigned key is pressed down.
- Click on save.
How To Make Razer Synapse Open On Startup?
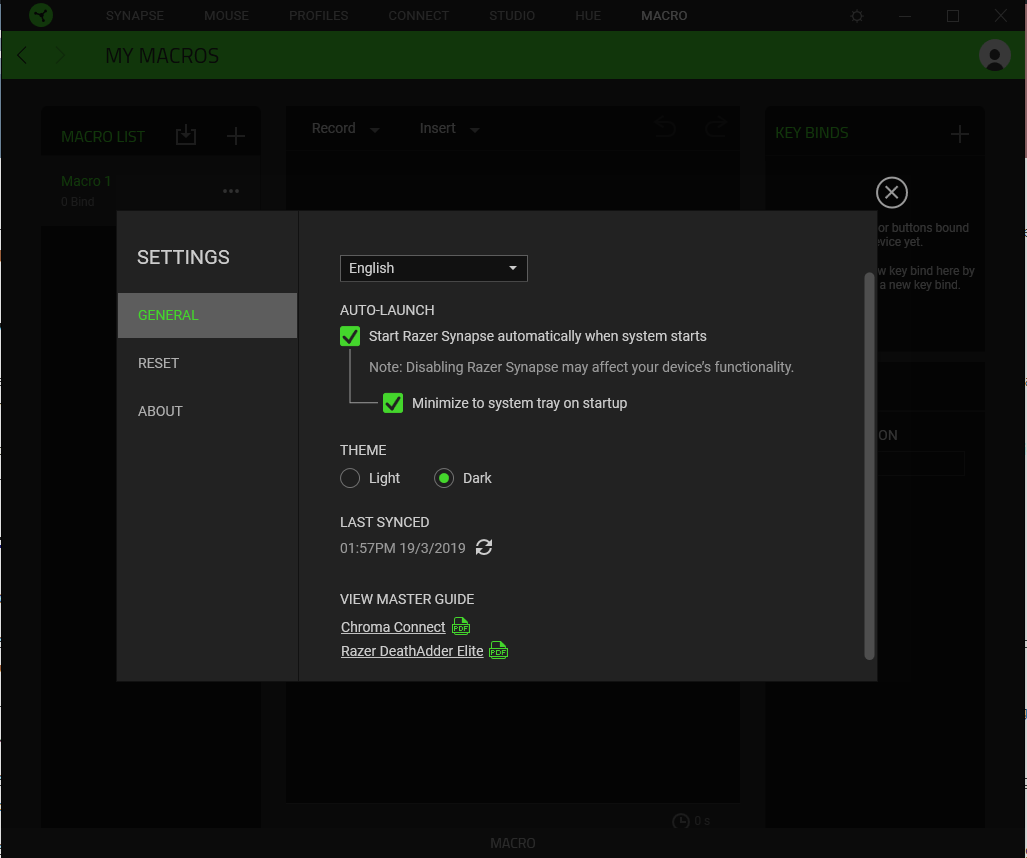
Click on the cogwheel ‘’Settings’’ icon in the top right-hand corner and tick the ‘’Start Synapse automatically when system starts’’ option.
How To Stop Razer Synapse Opening On Startup?
Click on the cogwheel ‘’Settings’’ icon in the top right-hand corner and untick the ‘’Start Synapse automatically when system starts’’ option.
How To Disable Razer Synapse?
To disable Razer Synapse, close the program and ensure it doesn’t appear in the taskbar. If it does, right click on the Synapse icon and click on close. You can also close Synapse by opening the Task Manager (Ctrl + alt +del), selecting ‘’Razer Synapse’’ then clicking ‘’End Task’’.
How To Uninstall Razer Synapse?
Click on the Windows Start menu and select Control Panel, then choose ”Uninstall a program”. Select Razer Synapse from the list and click on ”Uninstall/Change”. When asked ”Are you sure you want to uninstall Razer Synapse”, hit ”Yes”. The uninstall wizard will do its thing and remove Razer Synapse from your PC.
Razer Synapse 3 Troubleshooting
Razer Synapse Is Not Working/Opening, What Should I Do?
First and foremost, check to make sure your device is incompatible with the currently installed version of Synapse. Numerous legacy products are at the time of writing only compatible with Razer Synapse 2. Conversely, recently released devices only work with Razer Synapse 3.
If Synapse won’t work or won’t open, unplug your Razer device(s) and restart your PC. Open Razer Synapse and click on the ‘’Settings’’ cog-wheel icon in the top right-hand corner. Select ‘’About’’, then click on ‘’Check for Updates’’.
Synapse will download and install the latest version of the software. Once completed, plug your device in and relaunch the program and it should open.
If it still doesn’t, then unplug your device, open Synapse, then plug the device back in. The program will check for the latest firmware and download/install it automatically.
If the problem persists, uninstall Synapse completely, then download the latest version. Right click on the executable file and select ‘’Run As Admin’’. Complete the installation process and load up Razer Synapse.
Razer Synapse Is Not Detecting My Mouse/Keyboard/Headset, What Should I Do?
- Firstly, check that your device is compatible with Razer Synapse from the list detailed further up in our guide.
- Ensure your device is connected correctly to your PC by checking that the USB connector is inserted correctly.
- Restart your PC, especially if you have just installed Razer Synapse.
- Razer Synapse is particularly prone to bugs after installing updates. If the above steps don’t lead to your device being recognised, uninstall Razer Synapse completely, download the latest version, and reinstall.
- If the problem persists, the issue may hardware related and recommend getting in touch with Razer Support on the Razer website.
I Received Error 3803, What Does This Mean?
During the Razer account login process, you may occasionally encounter error 3803. The error refers to AWS server issue on Razer’s end restricting connections, resulting in a failed login.
More often than not the problem resolves itself within a few hours as Razer troubleshoots the issue. Alternatively, if the problem persists check your internet connection and make sure Windows is up to date.